Backing up your photos and files is essential to prevent data loss due to accidental deletion, hardware failure, or other unexpected issues. Whether you’re a casual user or someone with a vast digital library, having a reliable backup strategy keeps your important memories and documents safe. In this guide, we’ll explore easy and practical methods for backing up your files so you can enjoy peace of mind.
Why Backing Up Files Is Important
Our digital files—photos, videos, documents—often hold great personal or professional value. Losing them can be frustrating or even disastrous. Backups act as a safety net, allowing you to recover your data if the original copies become unavailable. Common reasons to back up data include:
– Hard drive failure or corruption
– Accidental deletion
– Device loss or theft
– Virus or malware attacks
– Software errors or updates gone wrong
By backing up regularly, you reduce the risk of permanent data loss.
Different Backup Methods to Consider
There are several ways to back up your photos and files. Choosing the right method depends on your needs, budget, and technical comfort level. The most popular options include:
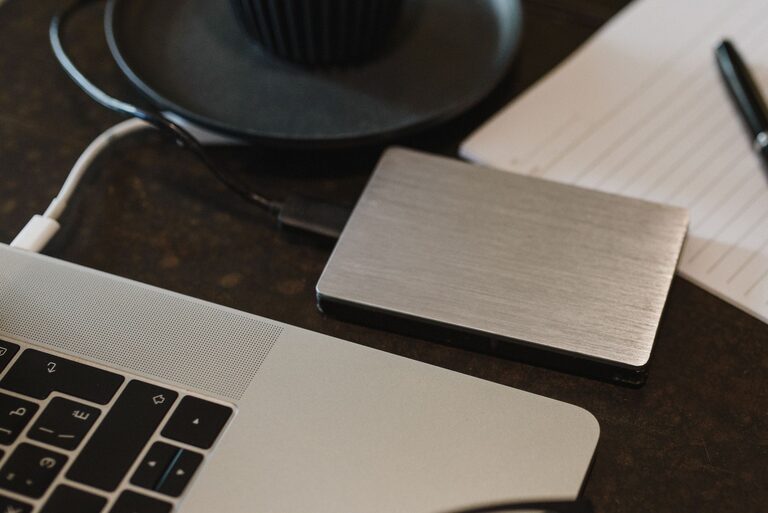
1. External Hard Drives or SSDs
Using an external drive is one of the simplest and most common backup methods.
– How it works: Connect a portable hard drive or solid-state drive to your computer and copy files manually or use backup software.
– Pros: Fast transfers, no internet required, good for large files, one-time purchase.
– Cons: Physical device can be lost or damaged, you must remember to back up regularly.
Tip: Keep your external drive stored safely and consider creating multiple copies if your data is very important.
2. Cloud Storage Services
Cloud backups save your files to remote servers accessed over the internet.
– Popular services: Google Drive, Dropbox, Microsoft OneDrive, Apple iCloud.
– Pros: Accessible from anywhere with internet, automatic syncing, easy sharing.
– Cons: Monthly fees for larger storage, depends on internet speed, privacy considerations.
Many cloud services offer apps that automatically back up photos from your phone or folders on your computer, making this option very convenient.
3. Network Attached Storage (NAS)
For tech-savvy users or those with large amounts of data, a NAS device is a private cloud at home.
– What it is: A small server connected to your home network that stores files accessible by all your devices.
– Pros: Large capacity, secure within your home, can be set for automatic backups.
– Cons: Higher upfront cost, requires setup and maintenance knowledge.
4. USB Flash Drives
USB drives offer a quick way to back up smaller amounts of data.
– Pros: Portable, inexpensive, easy to use.
– Cons: Limited storage capacity, less reliable for long-term storage.
Creating a Backup Plan
A good backup plan includes these key considerations:
Schedule Regular Backups
Back up your files on a consistent schedule—weekly or monthly depending on how often you add or change files. Automatic backups, when possible, help ensure you never miss a session.
Use the 3-2-1 Backup Rule
This rule is a best practice to maximize data safety:
– Keep 3 copies of your data (1 original + 2 backups).
– Store the copies on 2 different types of media (e.g., external drive and cloud).
– Keep 1 copy offsite (such as cloud storage or a drive stored at a different location).
Organize Your Files
Before backing up, organize your photos and files into folders with clear names. This makes it easier to find and restore specific files later.
Test Your Backups
Occasionally test your backups by restoring a few files. This ensures your backup files aren’t corrupted and that you know how to recover them.
Step-by-Step Guide: Backing Up Photos and Files
Backing Up to an External Hard Drive
- Connect your external drive to your computer.
- Open your file explorer (Windows File Explorer or Mac Finder).
- Select the photos and files you want to back up.
- Copy and paste or drag and drop them into the external drive’s folder.
- Safely eject the drive when the transfer is complete.
- Create or sign into your Google account.
- Download and install the Google Drive app on your computer or phone.
- Choose folders or photo albums you want to sync.
- Enable automatic backup/sync in the app settings.
- Your files will upload and be accessible from any device with your account.
Setting Up Cloud Backup (Example: Google Drive)
Using Backup Software
If you prefer automated, scheduled backups, consider software like:
– Windows File History (built-in to Windows)
– macOS Time Machine (built-in to Mac)
– Third-party options like Acronis True Image or Backblaze
These programs allow you to schedule backups regularly and often support backup to multiple locations.
Conclusion
Backing up your photos and files doesn’t have to be complicated or time-consuming. Whether you use an external drive, cloud service, or a combination of methods, the key is consistency and having multiple copies. Start today by assessing what needs to be backed up and select the method that fits your lifestyle. With a proper backup routine in place, you can protect your digital memories and important files against unexpected data loss.
Remember, it’s better to be safe than sorry—taking a few minutes to back up now can save hours of stress later.